• Home
  • About Us
  • Products
  • FAQ
  • Instructions
  • Reviews
  • Customer Photos
  • More
    • Home
    • About Us
    • Products
    • FAQ
    • Instructions
    • Reviews
    • Customer Photos
  • Sign In
  • Create Account

  • Orders
  • My Account
  • Signed in as:

  • filler@godaddy.com


  • Orders
  • My Account
  • Sign out

Signed in as:

filler@godaddy.com

  • Home
  • About Us
  • Products
  • FAQ
  • Instructions
  • Reviews
  • Customer Photos

Account


  • Orders
  • My Account
  • Sign out


  • Sign In
  • Orders
  • My Account

Instructions for the Portable Shower

Attach the shower head

Ensure the thumb lever is closed

Ensure the thumb lever is closed

Attach the showerhead to the hose pipe by pulling back the grey sleeve and inserting it into the connector.

Ensure the thumb lever is closed

Ensure the thumb lever is closed

Ensure the thumb lever is closed

Ensure the thumb lever is closed by pushing it down to meet the body of the shower head.  This will ensure you avoid nasty surprises when you start to pressurise the cylinder

Unscrew the pump handle

Ensure the thumb lever is closed

The correct view of the pump

Unscrew the pump handle

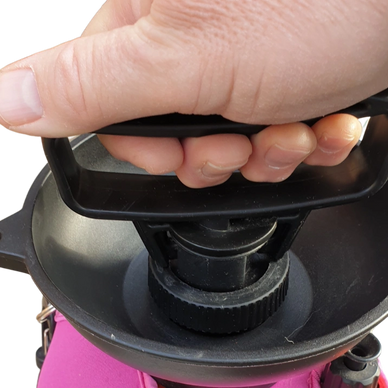
With the pump handle in the locked position, twist the handle anti-clockwise to unscrew. When using for the first time, it may need extra effort to 'unstick' the handle from the cylinder.

The correct view of the pump

The correct view of the pump

The correct view of the pump

This is what the pump should look like when removing it from the cylinder. If you see what looks like an internal mechanism, refer to the troubleshooting video below.

Fill the cylinder with water

The correct view of the pump

Fill the cylinder with water

Fill the cylinder with hot or warm water (do not use boiling water - tap hot is enough). Leave some air in the top to allow for pressure to build up. Make sure it's not too heavy to lift!

Refit the pump handle

The correct view of the pump

Fill the cylinder with water

Insert the pump handle into the cylinder and screw clockwise until it is fitted - finger tight should be enough, don't over-tighten.  Be careful water doesn't squirt out if you have over-filled the cylinder!

Stow securely in your vehicle

Pump the handle to build pressure

Stow securely in your vehicle

If you are taking the shower with you on a drive, use the quick-release strap to secure the cylinder.  We suggest fitting around a headrest to keep the unit upright

Select the shower setting

Pump the handle to build pressure

Stow securely in your vehicle

Twist the shower head to the desired setting. We recommend the 'flat' setting as a good choice for dog washing as it provides a wide spray pattern whilst maintaining adequate pressure

Pump the handle to build pressure

Pump the handle to build pressure

Pump the handle to build pressure

Release the pump handle from the locked position and pump 20-30 times to pressurise the cylinder.  You will feel resistance as the pressure increases, just like pumping up a tyre.

Ready to use

When you've finished

Pump the handle to build pressure

Aim the showerhead at the intended target and lift the thumb lever to start showering.  You will need to pump intermittently to maintain pressure

When you've finished

When you've finished

When you've finished

Close the thumb lever to stop drips and gently push the top of the pressure release valve to de-pressurise the cylinder

And finally...

When you've finished

When you've finished

Wrap the pipe around the cylinder neck being careful not to pinch it and stow securely in your vehicle using the quick-release strap, 

Troubleshooting

When you unscrew the pump handle and see the inside of the pump mechanism instead of the black pump tube, watch this video.

  • Home
  • About Us
  • Products
  • FAQ
  • Instructions
  • Reviews
  • Customer Photos
  • Privacy Policy

Petacarium

Copyright © 2024 Petacarium - All Rights Reserved.

Powered by GoDaddy

This website uses cookies.

We use cookies to analyze website traffic and optimize your website experience. By accepting our use of cookies, your data will be aggregated with all other user data.

DeclineAccept